Many important details must be considered when designing a solar racking system for a pitched or flat roof. Design considerations include the number of roof attachment points, attachment spacing, rail length, number of rails, module clamp size and grounding to mention a few. Although much of these specifications can be done by hand, this task can be tedious and prone to error. The last thing an installer wants is to be on the roof under a tight deadline and not have the right mounting bolts. Even what may seem like a relatively small oversight can delay a job for days. Design by hand also misses out on the real-time graphical design features offered online. The remainder of this article will spotlight Unirac’s U-Builder, one of the best free online racking configurators currently available.
Design It
The U-Builder configurator begins with module selection. This initial step is crucial as panels differ in thickness not only by manufacturer, but also by model within the same manufacturer's lineup. The U-Builder has dimensions on file for hundreds of modules from a wide range of manufacturers. It is unlikely you will not find the module you plan to use on your project. However if you do find yourself with an unlisted module, the configurator easily allows the user to input custom module dimensions.
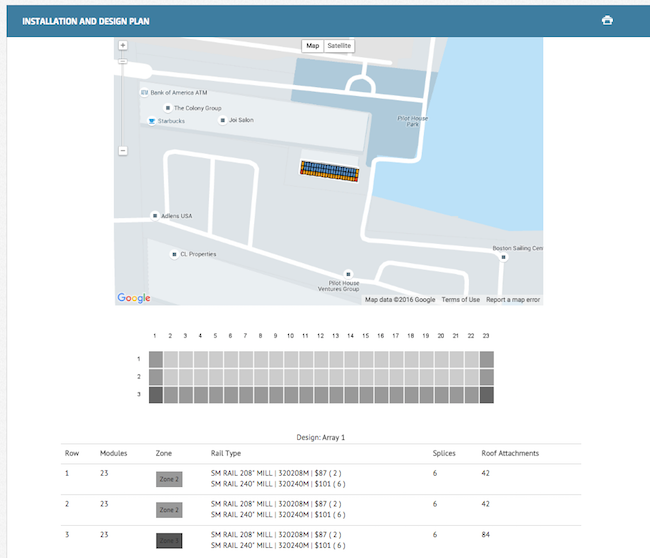
After selecting the correct module, the user is presented with the opportunity to input the project address directly into an embedded Google Maps interface. Although a basic column/row interface is available, Maps integration greatly enhances the proposal generating power of the configurator. This allows the user to trace the roof outline of the home or business to determine how many modules will fit on the roof in either portrait or landscape orientation given the user supplied pitch. Once U-Builder fills the sketched array area, the user can shift entire rows and individually toggle modules on or off. If a project requires multiple arrays on different roof planes, the configurator allows multiple subarrays to be configured in the same manner above independently.
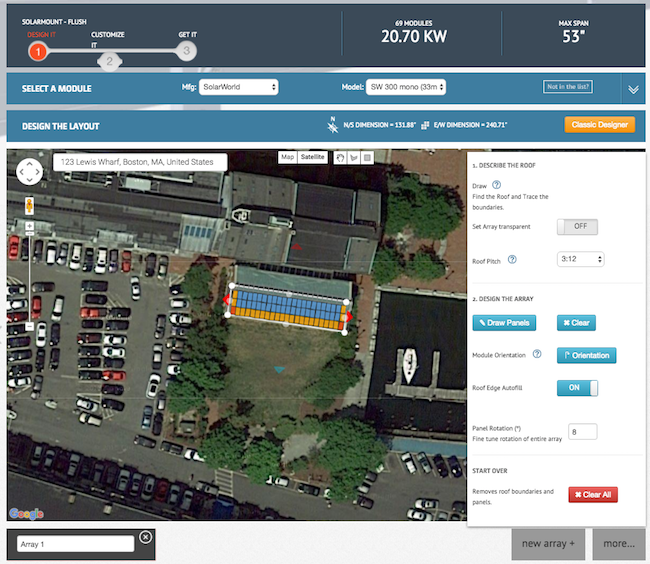
The configurator will also automatically color modules based on the roof zone they lie within. Interior modules are colored blue to indicate Roof Zone 1. Modules in Roof Zone 1 are subject to the least uplift conditions from wind. Modules that represent the outside edge of the array are colored a deep yellow color to indicate Roof Zone 2 (also called an Edge Zone). Due to their location on the outside of the array and/or near the building’s roof edge these modules are subject to higher wind uplift than the blue interior modules. Finally, the orange colored modules represent Roof Zone 3 for modules that lie on the corner of the array. Due to the location of these modules they are subject to the highest wind loads as two of their sides are exposed. This information is critical to correctly calculating attachment spacing of your array.
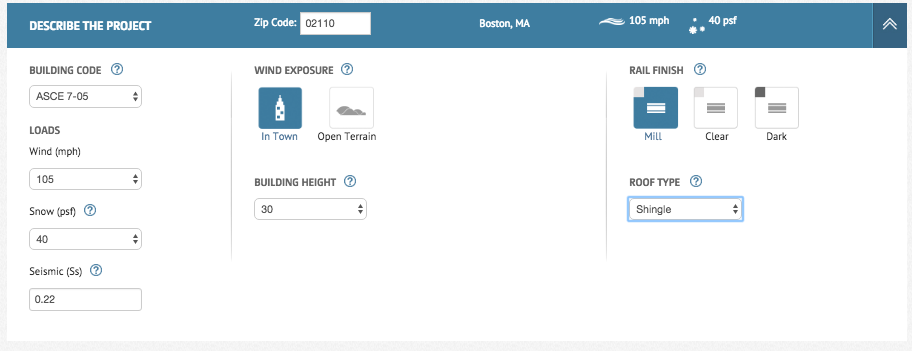
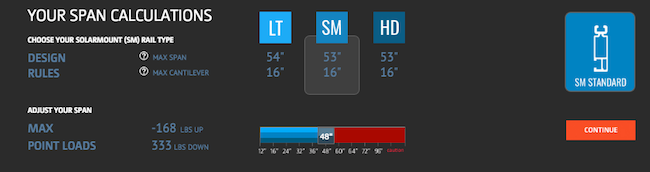
Together using the roof zone data and site specific data provided through Google Maps, the U-Builder calculates maximum uplift and point loads to determine the maximum rail span between attachment points. Although the configurator automatically populates data pertaining to building code, wind speed, snow load and seismic zone, the user must still consult their local AHJ prior to finalizing their bill of materials (BOM). For this reason all site characteristics can be manually overridden. Roof pitch, array shape and local environmental conditions all impact attachment spans.
Customize It
Once the site and arrays have been finalized, the user is prompted to customize their BOM. From here the user can adjust rail selection of a particular rail length as desired. The tool will also calculate the lowest cost mix of rail lengths if the Lowest Cost box is selected. Other customizable selections include roof attachments. Users can select from standoffs, lag bolts and composition shingle flashings. Accessories can also be added to the BOM including microinverters, optimizer mounting bolts, wire management clips and grounding lugs. As accessories are added or removed, the BOM will update in real time at the bottom of the window. Furthermore, the BOM itself is interactive, allowing for the user to adjust component colors, finish and quantities.

Get It
The final tab of the U-Builder clearly summarizes the racking project in its entirety and provides a host of useful information for the installer. As part of the design results the configurator will provide custom-generated PDF and CAD documents for the project. These documents include detailed part descriptions with pictures, an engineering report and an installation design plan. If the project uses the ballasted RoofMount solution for flat roofs, the installation plan will include a complete ballast plan with block weight recommendations. Prior to procurement and installation, these values must be confirmed with a structural engineer and your local AHJ Project documentation includes state specific code compliancy letters, UL certification and system detail drawings. In addition to aiding the installation, these documents can be included in the project's permit package.
Helioscope Integration
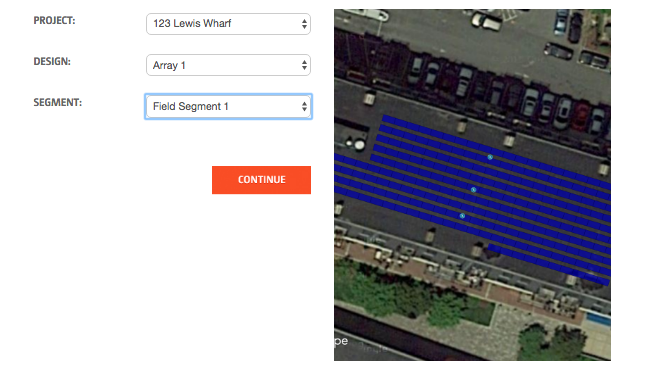
Unirac recently announced the integration of the HelioScope solar design tool with the U-Builder configurator. This partnership allows users to seamlessly build ballasted RoofMount BOMs from designs established in HelioScope. By allowing projects to be be pulled directly into the U-Builder interface, the user is saved the tiresome and occasionally frustrating task of transferring a design from one configurator to the other. To enable this feature users with a free Unirac U-Builder account must first update their user preferences to enter their Helioscope login credentials. Once this is complete, “Import from Helioscope” will appear as a new project type within the U-Builder. To import the project the user will be prompted to select not only the desired HelioScope projects, but also the desired design and field segments. As these selections are made the configurator will automatically insert a screenshot of the HelioScope design to easily determine the correct design has been selected.